

コダック KODAK EKTAR H35 ハーフカメラの使い方と説明書
NEWS!(2023/09/11)
おしゃれなコダックのハーフカメラ、新型の「Kodak Ektar H35N」が登場!
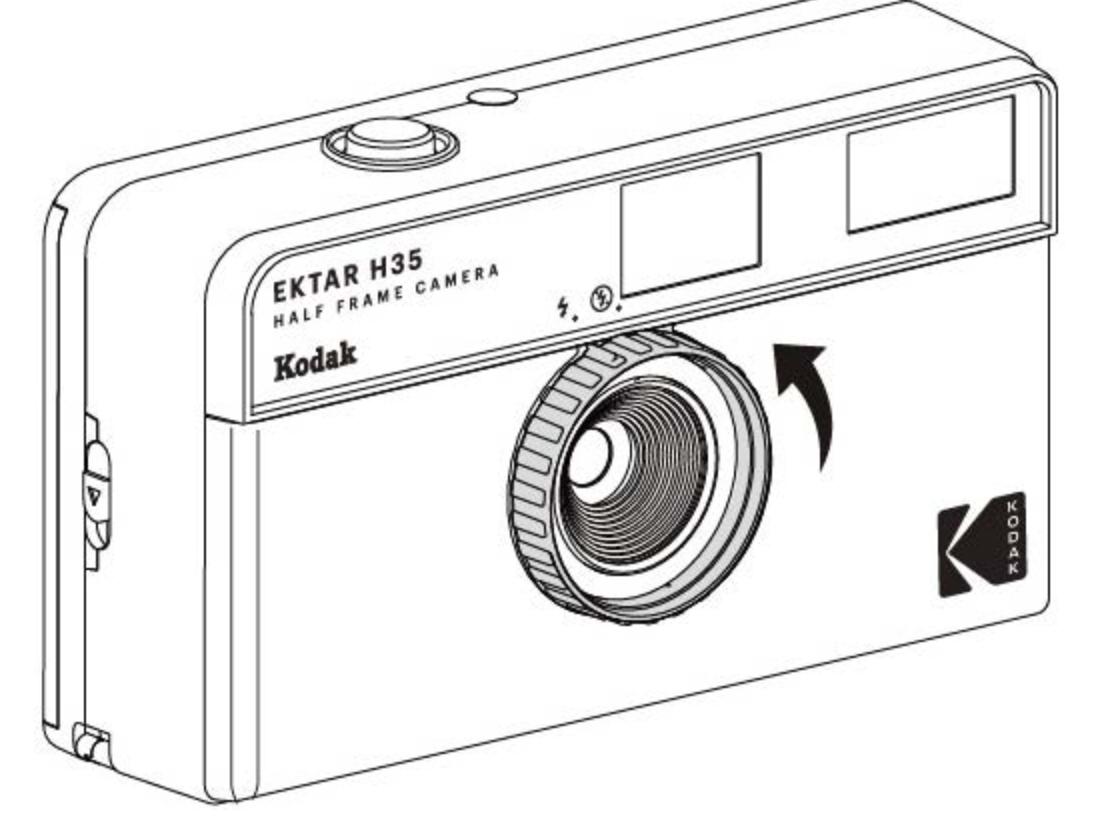
KODAK EKTAR H35とは?
コダック「KODAK EKTAR H35」ハーフカメラ オシャレでかわいいと大人気
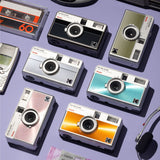
Colors
購入はカメラをクリック。


各部名称

1. 裏蓋
2. 裏蓋ロックレバー
3. フィルム室
4. フィルム巻戻し軸
5. フラッシュ
6. フィルム巻上げダイヤル
7. フィルムスプロケットギア
8. フィルム巻き取りスプール
9. シャッターボタン
10. フィルムカウンター
11. ビューファインダー
12. フラッシュオン/オフホイール
13. フラッシュチャージライト
14. フィルム巻き戻しボタン
15. フィルム巻き戻しクランク
16. 電池室カバー
17. レンズ
18. カメラストラップホルダー
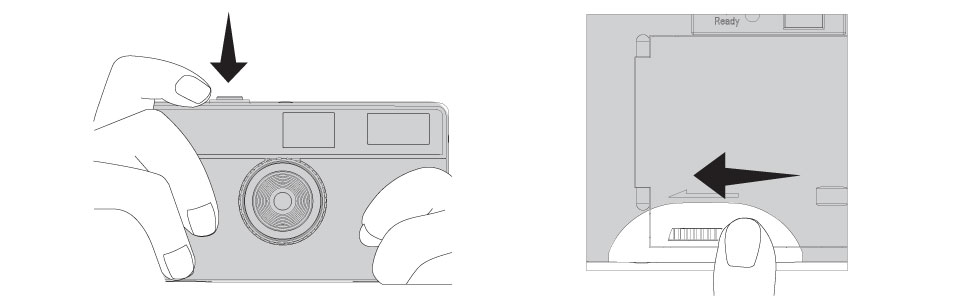
ご使用前に必ずご確認ください
1. カメラの裏蓋(1)を開けた状態で光に向かって1度※空シャッターを 切ってください。シャッターボタン(9)を押した瞬間にレンズの裏側から光が見えればカメラが正常に動作しています。
※「空シャッター」を切るには、まずフィルムが入っていない状態で裏蓋を開け、中央部の「長方形窓の下にあるスプロケットギア」を左にカチッと止まるまで指で動かしてください。ギアが止まりましたらシャッターボタンを押して空シャッターをきることができます。尚、この動作を行わないとフラッシュも作動いたしません。
2. 電池室(16)に単四アルカリ電池を入れ、カメラ正面のフラッシュオン/オフホイール(12)をオンに切り替えてください。ファインダー(11)横のフラッシュチャージライト(13)が点灯するか確認してください(初回はフラッシュチャージに時間がかかります) 。フラッシュチャージライト(13)が点灯したら、※空シャッターを切って フラッシュ(5)が発光するか確認してください。
3. フィルム巻取りスプール(8)に軽く指を当て、フィルム巻上げダイヤル(6)を動かしてください。フィルム巻上げダイヤル (6)に連動してフィルム 巻 取りスプール ( 8 ) が 動いていれば正常で す。
4. 正常に作動していない場合は、フィルムをいれず購入したお店に購入後30日以内に返品してください。
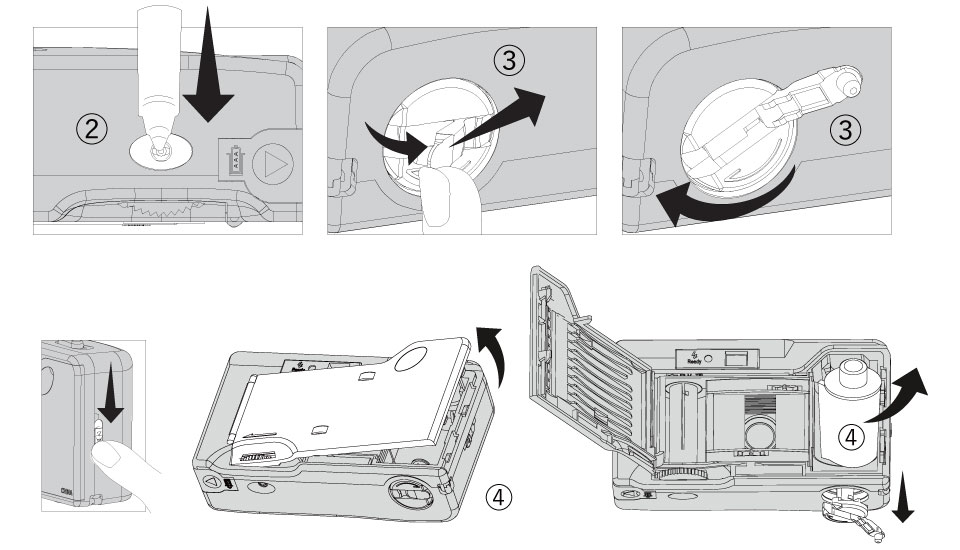
フィルムの装填方法

1. カメラ横のレバーを下げると裏蓋が開きます。
2. 巻き戻しクランクを引き上げてからフィルムを装填してください。
3. フィルムをフィルム室に入れます。
4. フィルム装填後は巻き戻しクランクを下に戻します。
5. 左側から右側にフィルムを引き出し、右側の巻取りスプールの突起にフィルムの先端を引っ掛けます。
6. フィルムの穴と、カメラ側のギアが噛み合っているか確認します。
7. フィルム巻き上げダイヤルを回して、フィルムを進めフィルムが平らになるよ うにして蓋を閉めます。
8. 巻き上げダイヤルを止まるまで回しシャッターを押すを繰り返しカウンターが「1」で撮影準備完了
電池の装填

1. バッテリーコンパートメントカバーを押して開けます。
2. 単4アルカリ電池1本を手前を+表示によるして挿入します。
3. 電池挿入後バッテリーコンパートメントカバーを閉じます。
写真撮影手順
1. ファインダーをのぞいて構図を確認します。
2. 撮影する時は、必ず1.5m以上離れて撮影してください。
3. フラッシュをオンにするかどうかを決定します。
4. シャッターボタンを軽く押すと撮影出来ます。
5. 写真を撮った後、巻き上げレバーを止まるまで回します。
6. 手順1〜5を繰り返して、次の写真を撮ります。
撮影終了後の手順
1. 最後の写真を撮った後、フィルム巻き上げを止めます。
2. フィルム巻き戻しボタンを押してから巻き戻しを開始します。
3. フィルム巻き戻しクランクを持ち上げ、時計回りに回転させてネガを巻き戻します。
フラッシュの使用方法

1. 屋内や薄暗い/曇りの環境で撮影する場合は、フラッシュオン/オフホイール動かして、フラッシュをオンにします。
2. フラッシュレディライトが点灯するまで待ちます。
3. 使用しないときはフラッシュをオフにしてください。
保証期間と修理について
この製品は修理を前提としないプラスチック製のカメラです。 購入日から30日以内で、正常に動作しない場合のみ、無償交換いたします。カメラに欠陥があることがわかる写真や動画のご提供をお願いします。尚、カメラに欠陥があった場合でも、本体の交換以外、フィルム代金や現像代金、その他の保証は一切いたしません。
次のような場合には、保証期間内でも交換返品の対象外となります。
・誤ったご使用、不注意、落下、不当な修理、分解、改造、天災、地変等による故障または損傷。
・ご使用上に生じる外観の変化。
コダック KODAK EKTAR H35 ハーフカメラの作例
